Events
The Events feature provides a simple, built-in tool for creating and managing agency events for users when they log into their First Arriving account and on your large-screen dashboards.
Important:
The Events Calendar is independent of Google Calendar, Outlook, iCal, or any third-party calendar system.
There is no external calendar integration at this time.
Events must be created and managed directly within the User Accounts Admin Panel.
1. Calendar Overview & Key Differences from Google/Outlook Calendars
The built-in Events Calendar is designed specifically for internal agency communications, allowing you to publish and manage events visible to members through User Accounts and optionally on Dashboards.
Key differences from external calendars:
Standalone System: Events created here do not sync to or pull from Google Calendar, Outlook, or any other system. You can still utilize these other platforms to display events on your Dashboards separately.
Optimized for First Arriving: Events are formatted to match User Account presentation and Dashboard card layouts.
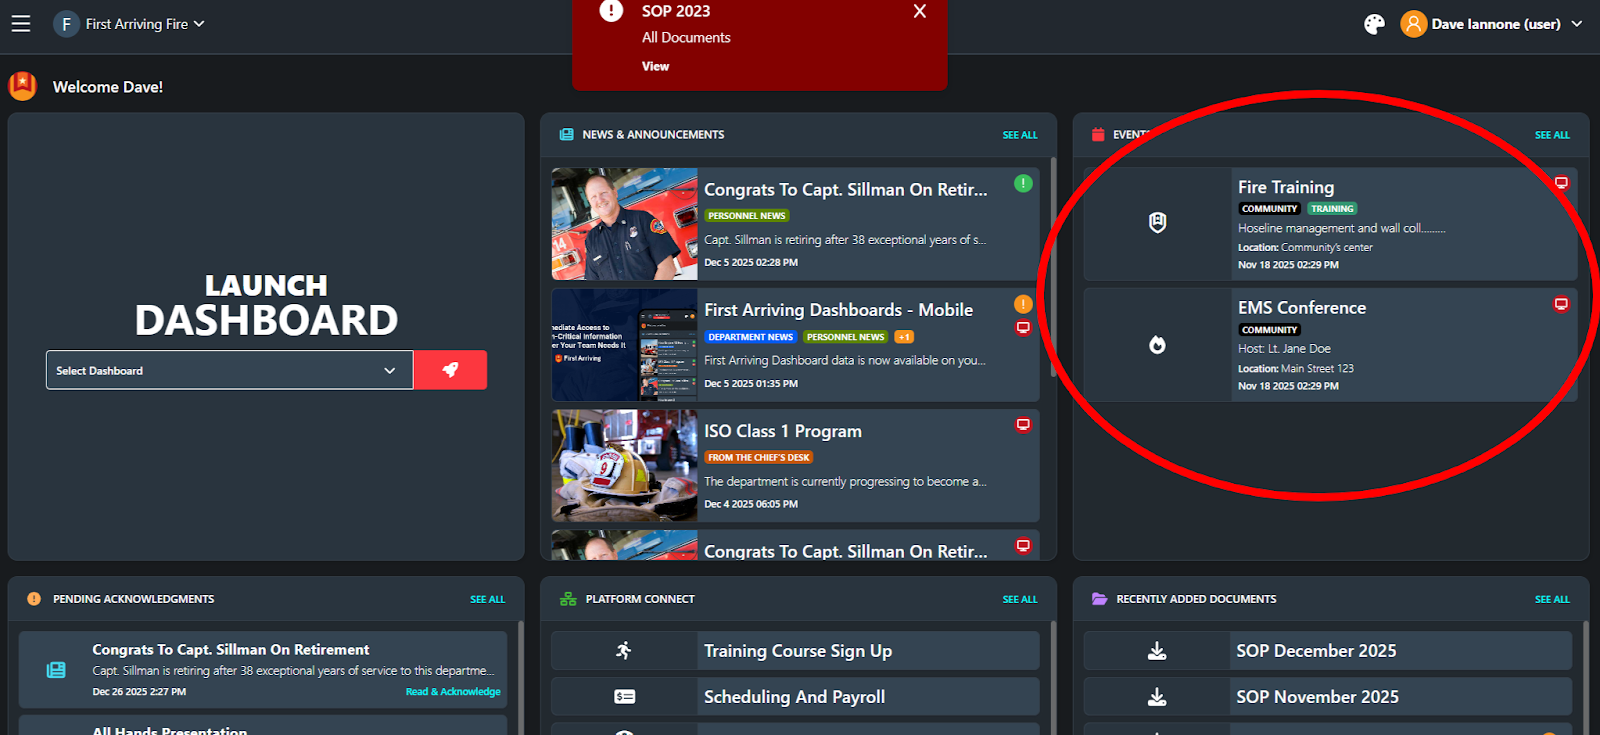
Optional Dashboard Display: Unlike standard calendars, these events can be directly pushed to your dashboards for station-wide visibility.
Agency-wide Consistency: All users (desktop, tablet, mobile) see the same event details and categories.
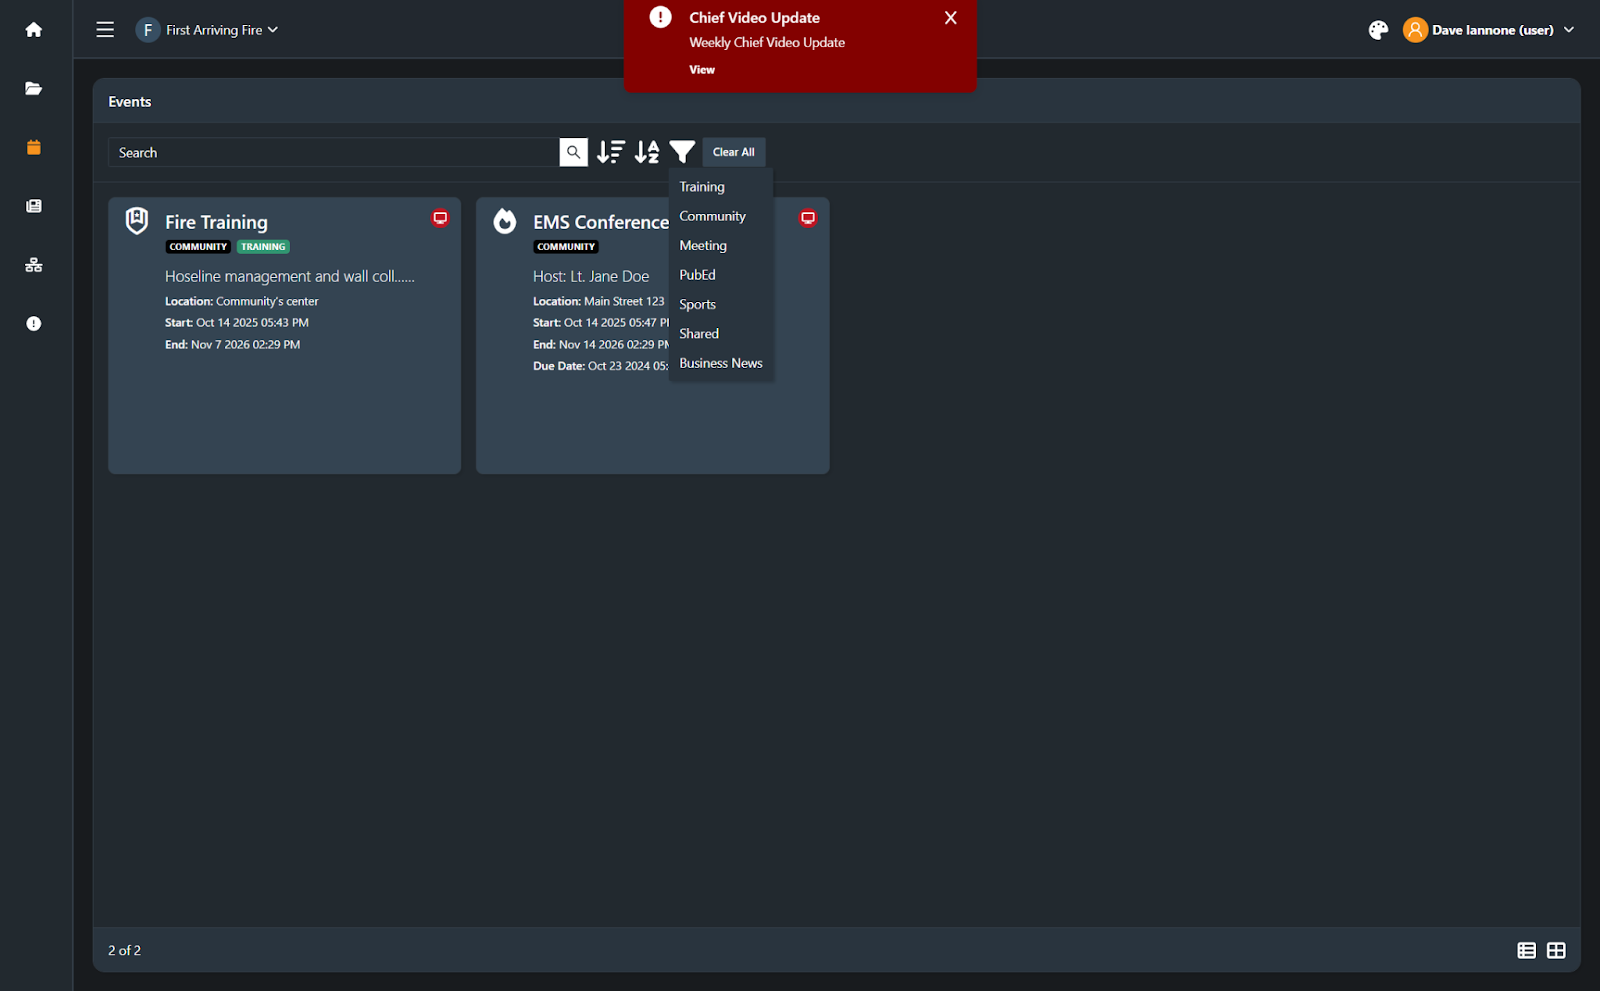
2. Accessing/Viewing Events
User Account View
Dive In within User Accounts to Search, Filter by Category, & Sort
Mobile App / Mobile Web View

Big Screen Dashboard View

3. Creating Events
To create a new event:

Navigate to the Events section in the Admin Panel.
You’ll see a “Create Events” section on the left hand side of the page.
Enter core event details:
Event Title
Description (purpose, agenda, instructor, required equipment, notes)
Location (station, training center, virtual link, apparatus bay, etc.)
Category(s)
Start/End Date & Time (required)
Require Acknowledgement
Send to Dashboards
Select Icon (optionally)
Save the event.
Events instantly become visible to all appropriate users and dashboards based on your selections.
4. Editing or Removing Events
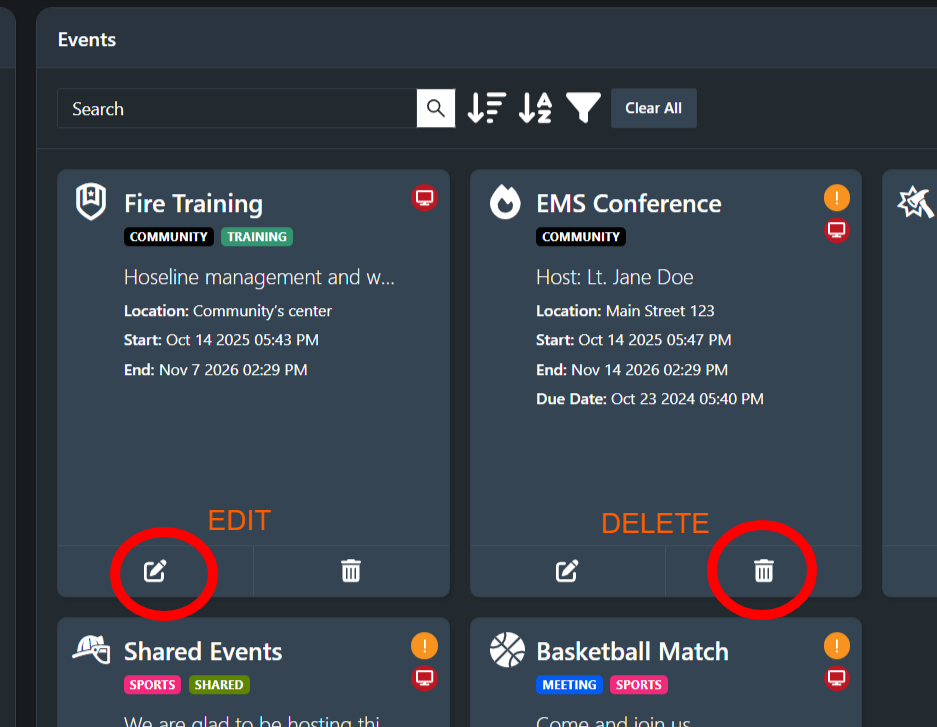
To edit an event, select the Edit icon from the event list, make your changes (times, description, categories, location), and save.
To delete an event entirely, select the Delete icon from the event options
Confirm the deletion on the pop up message

Changes update automatically across User Accounts and any dashboards where the event is displayed.
5. Pushing Events to Dashboards
The ability to display events from User Accounts on our Dashboards is setup during implementation or later by support. You can choose to display all events on your Dashboards, or events by specific category(s).
This allows agencies to highlight critical dates—training, inspections, community events, shift changes—directly on the big screen.

6. Tagging Categories for Discoverability
Categories make events easier for users to locate and help segment event displays on dashboards.

Common categories include:
Training
Meetings
Community Events
Maintenance
Duty Crew / Standby
Chief’s Office Notifications
Benefits of tagging:
Users can filter events by category in their personal view
Dashboards can display category-specific events (e.g., Training-Only pane)
Agency administrators can maintain better event organization at scale
To create a new category, follow the instructions here.
7. Requiring Acknowledgment of Event Postings

Create or edit content
Create the Event as described above..
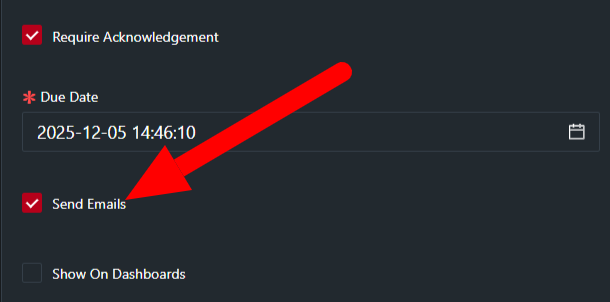
Turn on Required Acknowledgement
Locate the Required Acknowledgement option or checkbox.
Toggle it On for this content item.
Assign a due date if applicable.
Publish the content
Click Save.
The required acknowledgement prompt will appear for selected users the next time they access their account.
Monitor acknowledgements
Go to the Acknowledgements / Reporting view.
Track who has acknowledged, who is outstanding, and export data if needed.
8. Sending Events via Email Notifications
When an email notification is enabled (for Required Acknowledgements only):
Every user assigned to the relevant content group (or entire agency) receives an email simultaneously.
The email contains the title, body text and a link to view the item inside User Accounts.
To send via email:
Toggle Send Emails when requiring an acknowledgement when publishing the announcement.
What the Email Notification looks like:

Best practices:
Use email for time-sensitive or safety-related items.
Avoid overuse to prevent “alert fatigue.”