Platform Connect – Web Directory Management
Platform Connect is your agency’s centralized, staff-facing directory of essential links, resources, tools, and online systems. It functions as an internal “launchpad” that gives your staffmembers quick access to the websites and resources they use most—directly from desktop, tablet, or mobile devices through the User Accounts platform.
The video and information below outlines how to organize, add, edit, categorize, and delete web links; structure them for ease of navigation; send them via email; and leverage categories to improve discoverability.
Important: Platform Connect does not propagate to wall-mounted dashboards or full-screen display devices. It is strictly a user-facing resource directory that they can see when they login to their account.
2.7.1 Understanding the Staff-Facing Directory of Key Resources
Platform Connect is designed to give personnel effortless, centralized access to critical agency resources. These are the types of links typically included:
CAD system login
RMS systems
LMS/Training platforms
Scheduling or staffing tools
ICS forms
SOPs or policy repositories
HR & benefits sites
IT helpdesk or ticketing portals
Apparatus/maintenance portals
Form submission tools
Community engagement or public-links (if approved)
How users experience it:
Links appear in a clean, card-based or list-based layout.
Categories help group similar resources (e.g., Training, Operations, HR, IT Systems, Station Resources).
Users can tap/click to open links directly in a new tab or within their app browser.
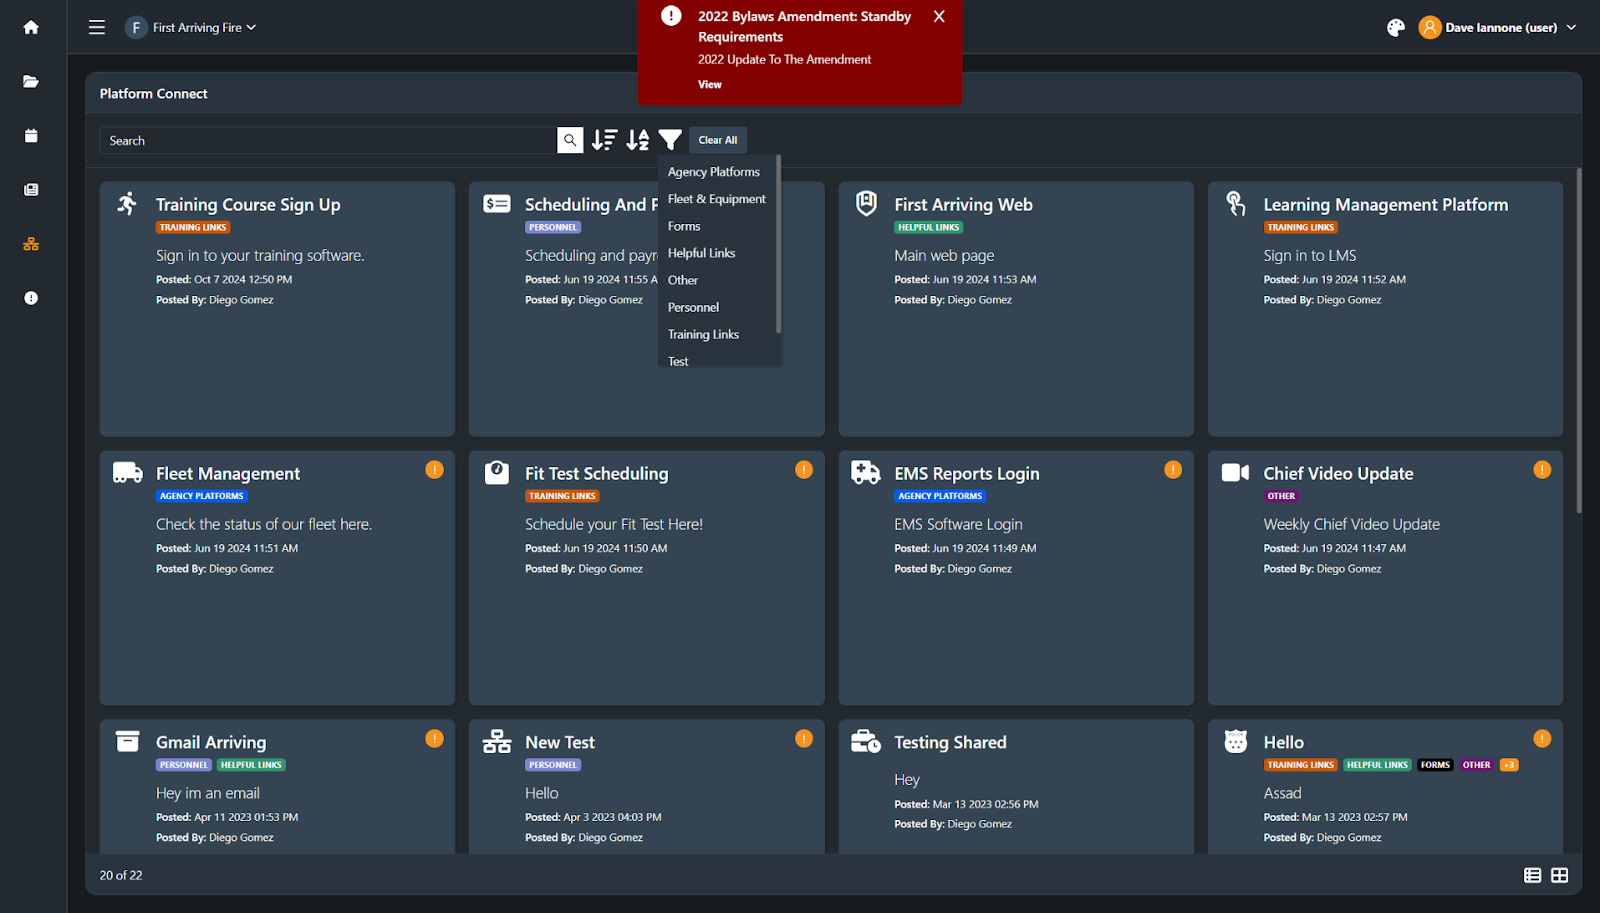
1. Accessing/Viewing Platform Connect
User Account View

Dive In within User Accounts to Search, Filter by Category, & Sort
Mobile App / Mobile Web View

2. Adding New Links
To add a new link:

Navigate to Platform Connect in the Admin Panel.
You’ll see “Create Platform Connect” on the left hand side
Complete the required fields:
Name – visible to users
Description (optional) – explains purpose or audience
Category(s) – choose the appropriate category(s)
URL – full web address (https://…)
Require Acknowledgement – (Check to Require, details below)
Select an icon optionally
Hit Save to publish.
Best practices:
Use clear, intuitive link names (e.g., “ESO Training Portal,” “Kronos Scheduling,” “HR Policies & Forms”).
Add short descriptions to reduce confusion (e.g., For scheduling swaps and viewing your assigned shifts).
Verify URLs before publishing.
3. Editing or Deleting Existing Links
As systems evolve or URLs change, Platform Connect links may need updates.
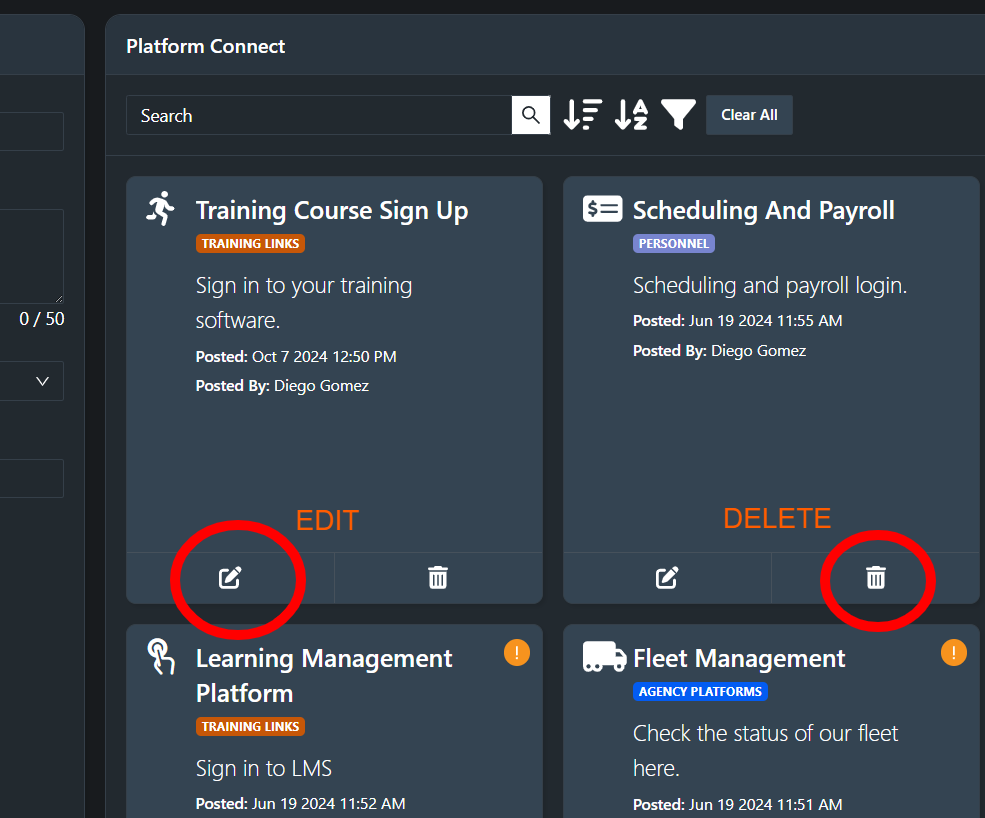
To edit a link:
Locate the item in the list view.
Click Edit.
Update title, URL, description, or category(s).
Save changes.

To delete a link:
Open the link’s edit view or use the actions menu.
Click Delete.
Confirm when prompted.

Notes:
Deleting a link removes it immediately from all user views.
Editing a link updates it everywhere with no disruption to users.
4. Categorizing Links for Better Organization
Categories are crucial in Platform Connect for keeping the directory clean, searchable, and intuitive.
Common categories include:
Training
HR & Admin
Operations
IT & Systems
Station Resources
Health & Safety
Scheduling & Staffing
Forms & Reporting
Categories:
Improve navigation
Allow users to filter content
Group related tools
Make the mobile experience cleaner
Support future analytics and reporting tools
To create a new category, follow the instructions here.
5. Structuring Links for Easy User Navigation
How links are structured significantly affects user experience.
Best practices for structuring your directory:
1. Group logically by purpose, not department.
Avoid categories like Chief’s Links or Admin Team unless these are true audience groups.
Use functional categories like Training, Forms, Scheduling, IT Systems.
3. Avoid duplicate links.
Consolidate multiple URLs for the same system if possible.
4. Use descriptions wisely.
Add brief instructions such as:
Use your agency email to log in
Best opened from Chrome
VPN required when off-station
6. Requiring Acknowledgment of Platform Connect Postings
Create or edit content
Create the Platform Connect item as described above..

Enable Required Acknowledgement
Locate the Required Acknowledgement checkbox.
Toggle it On for this content item.
Assign a due date if applicable.
Publish the content
Click Save.
The required acknowledgement prompt will appear for selected users the next time they access their account.
Monitor acknowledgements
Go to the Acknowledgements / Reporting view.
Track who has acknowledged, who is outstanding, and export data if needed.
7. Sending Platform Connect via Email Notifications
When an email notification is enabled (for Required Acknowledgements only):
Every user assigned to the relevant content group (or entire agency) receives an email simultaneously.
The email contains the title, body text and a link to view the item inside User Accounts.

To send via email:
Toggle Send Emails when requiring an acknowledgement when publishing the announcement.
What the Email Notification looks like:

Best practices:
Use email for time-sensitive or safety-related items.
Avoid overuse to prevent “alert fatigue.”